
Can I Confidently Take Photos for My Blog?

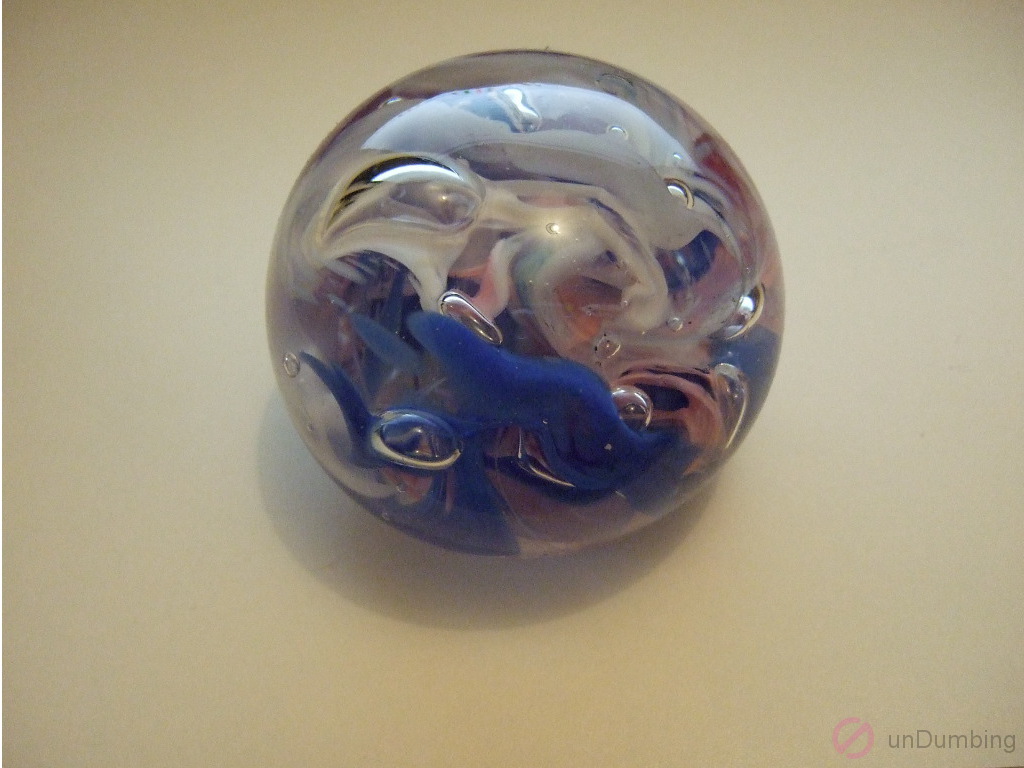
Yes, I can! After I took a Digital Photography tutorial, learned about which of our camera(s) had the features that I wanted, and experimented by taking over a hundred shots of an object, I was able to capture the above featured photo!
Come join me while I highlight the following areas:
- My Story
- Learning the Concepts
- Choosing a Camera
- Taking Photos/Solving Problems
- Continuous Improvement
- Lesson for Dumber Self
- Next Step for You
By learning to shoot my own photos, I’m hoping to secure more original images to use for my blog content, while maintaining creative control and saving time on a budget.
My Story
The extent of my interest with using a camera up to this point was just to document what I wanted to remember. There wasn’t a need to explore the advanced features of a camera. As long as the process was simple and result clear, I was satisfied.
Now, I have more reasons to start an adventure in photography!
To begin my journey, I learned some basics, selected the equipment, captured images, and researched ways to fix or minimize the issues that I saw in my pictures.
Learning the Concepts
I had previously found the Digital Photography module provided by GCFLearnFree.org when I was researching photography lessons for my son’s homeschooling, so I went through that course. It broke information down in clear, digestive pieces.
After completing the session, I was off to find a mirrorless camera that’s lighter and more portable that a DSLR camera, but still produced very good image quality; allowed for manual changes to the shutter speed, aperture, and ISO settings; and included special features, like macro mode for close-up photographs and scene mode presets for convenience.
Choosing a Camera
I consulted with my DH to see if we had any cameras fitting my requirements. After our discussion, he narrowed it down to a Panasonic Lumix DMC-FT20/DMC-TS20 and a Fujifilm FinePix F31fd. I tested both cameras and chose the Fujifilm FinePix F31fd as my starter camera because it took better low-light pictures, had a more straight-forward menu system, and included quick-access buttons for frequently-used features in logical locations.
Taking Photos/Solving Problems
During the first session, I took about 50 close-ups using the auto shooting mode with macro and auto-focus. I tried to use the rule of thirds concept (placing the subject at one of the intersections where the horizontal and vertical lines met if a snapshot was divided into thirds horizontally and vertically) to compose the shots.
Here’s one of the photos from the first batch:
What stood out to me were the reflections and the overly warm white background. For the next session, I wanted to place the paperweight on a cooler white surface under sunlight. Will the change help?
Here’s a snap from the second session:

This time, I found the surface too dark and a reflection also on the object. After doing some research on how I might minimize these two issues, I came across an article, Are You Making These 7 Common Mistakes in Your Clothing & Apparel Photography?, on the Pixelz blog on how to set up lighting when photographing glass.
Using materials that I had around, I created a quick lighting setup using an iPhone flashlight as the backlight and white paper above, behind, and under the paperweight. After taking another fifty photos, I was able to capture the image featured on the top of this page with more lighting and no glare.
Even though I was able to produce a beginner’s photo that I’m happy with, there’s so much more to do to strengthen my photography skills. Below are some actions for me to start with:
Continuous Improvement
- Snap more photos under different conditions and apply techniques to fix the issues
- Experiment taking pictures after manually changing the shutter speed, aperture, and ISO settings
After completing my first photography assignment, I learned one major lesson.
Lesson for Dumber Self
- Taking your own photos needs perseverance!
What will you do now?
Next Step for You
- Pick up a camera and click away?
- Try again for that beautiful shot?
- Read another post on this site? (Go to the menu at the top of the page.)